Tuesday, December 7, 2010
Friday, October 29, 2010
Thursday, October 28, 2010
Thursday, October 14, 2010
Tuesday, October 5, 2010
Unit 1 - Summative 1- Pop Art
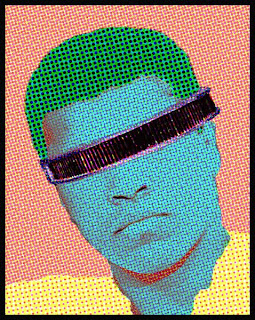 http://www.google.ca/imgres?imgurl=http://fr.academic.ru/pictures/frwiki/77/Muhammad_Ali_NYWTS.jpg&imgrefurl=http://fr.academic.ru/dic.nsf/frwiki/1176021&usg=__ud4SPDXtFZLtsTgGwUFIcdtX338=&h=3765&w=3000&sz=469&hl=en&start=0&zoom=1&tbnid=0x-8JxrUMLlEVM:&tbnh=119&tbnw=95&prev=/images%3Fq%3Dmohamed%2Bali%26um%3D1%26hl%3Den%26sa%3DN%26biw%3D1024%26bih%3D701%26tbs%3Disch:10%2C3&um=1&itbs=1&iact=hc&vpx=124&vpy=353&dur=282&hovh=119&hovw=95&tx=126&ty=115&ei=tU2rTNHvN4SBlAfYiOHbBw&oei=tU2rTNHvN4SBlAfYiOHbBw&esq=1&page=1&ndsp=24&ved=1t:429,r:12,s:0&biw=1024&bih=701
is the link for the origonal image.
Friday, October 1, 2010
Thursday, September 23, 2010
Thursday, March 25, 2010
Stamp
I chose this image because I thought it was cool to stamp myself in different colours, and because stamping is simply Awesome.
The first thing I did was select the Rectangular Marquee tool to select the image I wanted. After I had my general image, I went to 'Edit' , 'Define Brush Presets', and clicked 'OK'. After this, I opened up a new page. I selected the brush tool, and scrolled down in the Option bar till I found the image I had selected. After selecting the image, change the colour and stamp away!
Image on Image
I chose to use this particular image because i thought it would be neat to upload my face into another image.
The first step i took was to save an image that i wanted my face to be uploaded in, and upload it into Photoshop. The next was to an image of my head, that I thought could replace the head of the person within the image. Now I had two tabs with different images in Photoshop. I dragged one of the tabs out, so two images that I could work with appeared. I chose the lasso tool, and drew an outline of my head. Once I had finished the outline, I chose the move tool and dragged the image into the other image, over top of the head. Now, my head appeared way too small! So what we do from there is choose 'Edit' and then 'Free Transform' to modify the proportions of the head.
Border and Text
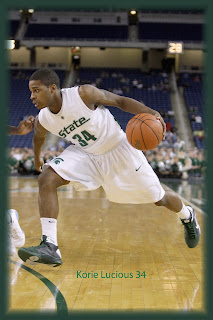
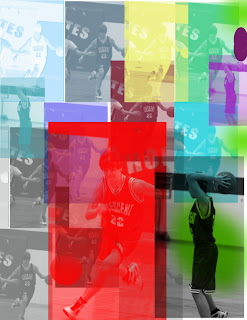
I chose to create this image in spirit of March Madness. Korie Lucious is my favourite player on my favourite team, The Michigan State Spartans. I created this in Adobe PhotoShop. I started off on a new page, and selected my desired image. I saved the image into into my H: Drive, and opened it into the page in Photoshop. I used the eye dropper tool to select the exact colour I wanted my border to be. From here, I selected the Rectangular Marquee tool in the toolbar. I selected where I wanted my border to be. I then clicked 'Select', 'Modify', then finally, 'Borders' And chose the number of pixels I wanted my border to cover.
I now had the border, however, I thought it would prove as a nice touch to incorporate some text into the image. I selected the Horizontal Type Tool in the toolbar, and selected an area on the image where I wanted the text to appear. After I de-selected the area, I began typing my text. After that, I highlighted my text and changed the font colour. I think this is a creative image.
Tuesday, March 23, 2010
Clone Stamping - My Wake Boarding Image

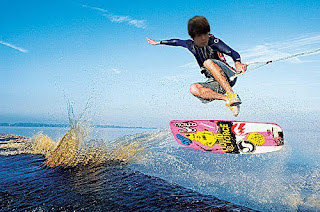
The reason I created this image was to expand my knowledge of Adobe Photoshop's features. I'm also a huge Wake Board fan.
Long Explaination:
I created this image in Adobe Photoshop. The first thing I did was I found an image that I really liked, and added it onto the blank page. So from there, I was left with the same image I had started, but that's NOT what we want to have the finished project look like. The next step I used was the "Clone Stamp" Tool (see the stamp icon). A circle should appear in place of your mouse. If you try and click on the image to clone it, an error should appear. This is because you haven't selected a focal point. To do so, press the 'Alt' key. A target should appear. Click on the image you want to duplicate. Let go of the key once you've chosen the point. Now any time you select the tool, you will be tracing the image! Be careful though, as if your tracing goes off of the image, you will be copying pressumably unwanted material. The area you are duplicating is highlighted by a cross or '+' looking symbol.
Steps (In Short) :
1) Open Program
2) File, 'New'
3) Select Desired image
4) Add into Photoshop
5) Select Clone Stamp Tool
6) Alt + click on starting point
7) Release alt
8) Click anywhere on image and drag to copy image.
Subscribe to:
Comments (Atom)


